Monday, October 21, 2013

Ever Seen a Gift Horse?

You know the old saying "never look a gift horse in the mouth".  Especially if that gift comes directly from mother nature herself.  It never ceases to amaze me what mother nature will thrive back into her own works.  If you read my post A Very Tiny Ficus I got two very welcome surprises from one big gamble. And even one more good reson to always use compost.

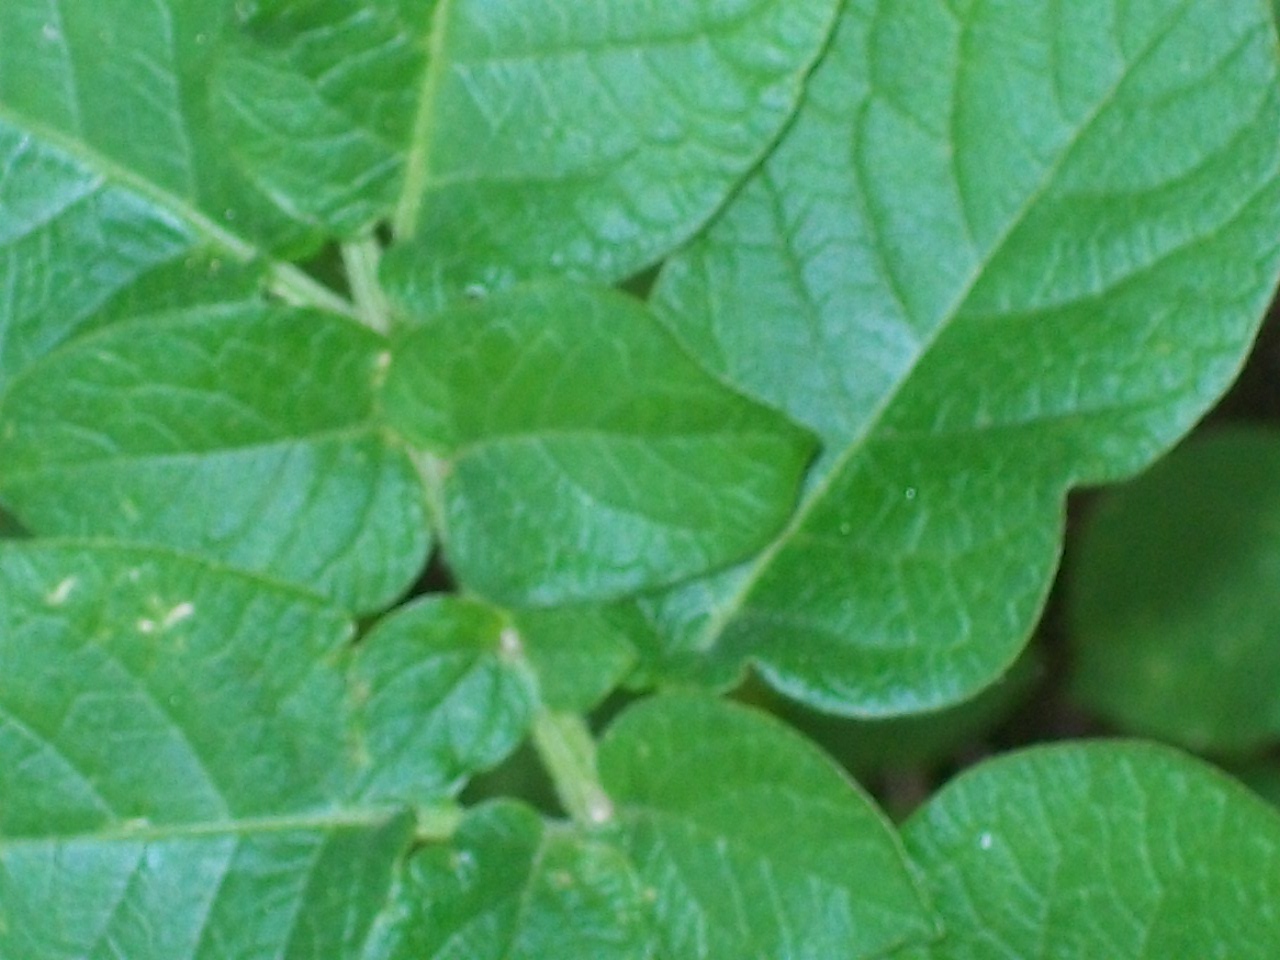
When I pot any new plant I mix in a generous helping of nutrition right from my compost.  I did the same when I planted the tiny ficus twig.  Out in the sun the tree began to flourish and take root nicely, but that wasn't all that was growing in my pot.  I began to notice a plant sprouting beside my new tree.  I immediately recognized the leaves of a vining plant, possibly a squash.  Not one to take anything for granted I immediately took my chances and move the plant from it's pot to the garden


At first I was very sceptical.  I knew I had something, but I wasn't sure it would survive the shock of a move.  I placed it underneath a tomato cage hoping to protect it.  I watched it struggle with the environment, but was determined not to give up.  I was more than curious to discover exactly what the surprise gift I had been given was.  After a few weeks it seemed to adept to the new surroundings quite well.  Even thought it was almost overshadowed by the extremely zealous sweet potatoes.  Nothing will hold those ambitious plants back. I had to lay the tomato cage on its side. The vines quickly outgrew the support. Before long little blossoms began to appear. I knew they were too small to be a squash of any sort.


My husband and I kept a daily vigil on the blossoms hoping something would peek beneath the pretty little yellow buds.  More and more appeared every day, but the harvest seemed slow at coming.  I was beginning to wonder if there would be any at all.  Low and behold along come the anticipated October rains.  There they were, no bigger than a forefinger!  Tiny little green shoots, narrow and full of fuzz.  Oh joy, oh joy!  How I do enjoy a cucumber!  The compost I had thrown in with my ficus tree was completed by a stray cucumber seed, that is now (strongly) multiplying in my garden.  I'm not sure how many will survive before the weather becomes to cold to sustain the produce.  It doesn't matter anyway.  Whatever the prize I will cherish it,  cause I never look a gift horse in the mouth!


Saturday, October 5, 2013

Coffee Grounds & Your Garden

Even if you don't drink it chances are pretty good you know someone who does.  Nearly every employee break room has a coffee center stocked with flavored creamers.  The beneficial uses of used coffee grounds are numerous, but do they really boost your crops?

Turns out they do.  These little jewels add three very important nutrients to soil- nitrogen, phosphorus, and potassium.  Coffee grounds are also considered slight acidic, but in a favorable range.  There are a several different ways to get the advantages of coffee grounds in you plants.


I like to drop mine directly into the compost bin.   The earth worms will feed off of the grounds and break up the component.  Grounds are also beneficial in maintaining the optimum temperature throughout the bin.  Why is it important to maintain your compost temperature?  To avoid possible seedlings, and deter unwanted pests.  Adding coffee grounds to the compost bin will also promote a richer, darker more beneficial feed for you garden as well as your house plants.


When I start new seedlings indoors for my spring gardening I always add fresh coffee grounds to the soil.  It gives my seeds the right start.  They come out strong and healthy.  I simply poor a couple of cups on top of the soil and mix in in well before planting the seeds.  To give the growth process and bigger boost use a small amount of leftover coffee to give the seeds a good drink.  Add fresh coffee grounds to any transplanted crops to give the roots a bit of stabilizing nutrition.  CAUTION; You never want to over do the coffee grounds.  Too much of anything isn't always a good thing. 


Coffee Grounds are also beneficial as a simple pest control.  Particularly slugs and snails when added to the garden.  Just be sure to ALWAYS use fresh, never spoiled, grounds.  Avoid using any flavored coffee grounds or fresh coffee.  The arouma will attract the wrong pests in abundance.

When the spring and fall gardening season have ran the full cycle and it's time to clean out the garden add plenty of grounds to give the soil the right jump on the next seasons crops.  It's a good idea to mix the ground well, but it doesn't hurt to top coat the soil with the grounds and let the winter do the work.


So what do you do if you are not a java fan?  Where do you go to get fresh coffee grounds for your plants?  First, and maybe one of the easiest is the world leader in coffee ground compilation.  Yes, I'm talking the one and only Starbucks.  Walk into you nearest Starbucks and for the asking you can get a free 5lb back of fresh grounds.  Hat's off to the mega giant for being so environmentally conscious.  What a great way to keep all of those grounds out of the landfill.

Recruit friends to help out your garden.  Offer to take the discarded grounds off of their hands.  Take advantage of that break room at work.  Set up a container and ask the other employees to save the grounds for you to take home.  Remind them of the benefits on the environment also.

If you do enjoy a fresh cup of coffee in the morning while you are revving up with a dash of caffeine don' forget to take advantage of those used grounds.

Wednesday, August 28, 2013

Doing the Right Thing

These trees are tall and pretty,
but they have an abundance of
berries that attract the wrong birds
 I don't mean to offend anyone.  I do hope you will understand our dilemma. I love nature, and I love birds.  We personally have six of them we care for.  Trees are vital to the balance of harmony in our environment.  You can never have too many.

We purchased our current home six year ago.  One of the most inviting parts of the property was the line of trees that stood tall among the back yard fence.  They were so majestic and beautiful swaying in the spring breeze.  They blanketed the back yard in a cool layer of shade.

Sunday, June 30, 2013

A Very Tiny Ficus Named Dan

I'll give just about anything a try if I can grow it.  This one really surprised me though.  One desperate shot in the dark turned into a pleasant reward.


There is a story behind my new Ficus that started in 1996 when I made a big move.  I left behind my home and migrated to a bigger city.  I was looking for better job opportunities.  I moved my girls into a tiny 2 bedroom apartment that was sufficient for the time being.  I hadn't been able to bring much to furnish our new home with.  My brother dropped by my apartment one day with a pallet of tiny, weather beaten plants.  There were about five of them and they definitely need plenty of TLC.  He had rescued them from a Walmart dumpster.  Imagine someone who will grow anything they can finally getting some new house plants!  I was so elated.

Tuesday, June 18, 2013

Do Your Tomatoes Need Help


There they are, big and beautiful.  Your mouth waters just looking at them.  You know they are going to be sweet and juicy.  But why aren't those tomatoes getting ripe?  Are you just being impatient, or do you have a situation going on you should be concerned about?  Maybe, but probably not.  The tomato is one of the hardest working crops in your garden.

Monday, June 10, 2013

The Potato-Seed to Crop


Chances are you’ve got them lying around your house.  You probably compliment at least one or more meals a week with them.  Bet you even created your own special dish using potatoes.  You can mash them, you can fry them, you can bake them, and you can make salad out of them.  So why not grow your own?  All you need is patience, space and one single potato to get started.
 
Potatoes’ are probably the easiest produce around to seed.  So easy as a matter of fact you can keep them going year after year from one healthy crop to another.  When you purchase potatoes you probably keep them in a cool dry place with plenty of ventilation.  They will keep fairly fresh that way for several month.  Eventually though little white “eyes” start peeking out of the potato.  Long, spiny little fingers that are actually roots.

One potato can sprout several roots at one time.   You will have the best luck if you plant in early spring and/or early fall.  Without washing the potato divide each eye into a separate section by slicing at least 1 to 1 ½ inches from the sprout.  If you wind up with more than one root in a section don’t worry.  You want to place the roots in the dirt as quickly as possible so be sure the ground is ready for planting a few days in advance.

To cultivate your plot make sure to loosen up the soil until it is very easy to work with.  If you do not have a compost going toss some coffee grinds, along with a handful of raked leaves in with the dirt.  Blend it in very well.  Now you are ready to plant.

Place each potato with the root side down in a hole that is 1 to 2 inches deep.  Place the seedlings 6 to 8 inches apart.  Be sure to water the plants and re check them every day.  Do not let the plants get to dry and keep any weeds or insects under control without chemicals. You will find many chemical free suggestions for insect and weed control on my plot at HomeLifeIdeas In no time you will find tiny healthy plants peeking from underneath the soil.


Potato plants will shoot straight up and grow anywhere to 3 to 3 1/2 feet tall.  When they are ready to harvest in about 45 to 60 day (dependig on your climate) you will notice a very petite pretty white blossom on the tips.  This is a sign that it’s time to check you crops progress.  With a shovel dig a shallow hole starting 8 inches from the plant.  Carefully work in toward the roots so you will not “split” a potato in two.  If the crop is not quite as big as you would prefer simply bury it again and wait another week and check for progress.
 
Next year you can keep the crop going and start the process all over using your own potato.  Just think of the bundles you can save!  If you have ever had fresh, home grown potatoes you know they have a much richer flavor than typical sore bought.   They make mashed potatoes unbelievable

Monday, May 27, 2013

What Makes a Garden Organic

It is one of the best reasons I know for gardening.  I like walking to my little plot of land and picking my own fresh crops.  It's even better because I know exactly what I am serving on my dinner table.  No unnecessary chemicals have touched the food that I will use in my favorite recipes.  It's a very simple choice to keep pesticides off of my harvest.  That's pretty reassuring to me.  But, exactly what qualifies as an Organic Gardening? 

Simply stated an Organic Garden will be a garden that is grown and produces without the use of harmful products such as fertilizers or pesticides. That is a fairly basic description when you stop to analyze exactly how to obtain the most productive garden and keep the weeds and the unwanted insects out.  I've touched on some simple ways to handle weeds in A Better Way to Eliminate Weeds.  I've also addressed those pesky insects in More Pests to Eliminate.  I do go on an on about my belief in the benefits of Compost.  That's just a brush on the canvas though.  It takes a little more to qualify a truly Organic Garden.

Organic Gardens first start with the right soil.  If you have previously treated with chemicals you will need to let the soil regenerate for a few years. Integrate the dirt with plenty of compost to help remove any unwanted interference.  You can continue to plant and the benefits will be rewarding.  You will be unable to call your produce fully organic until all signs of past chemical interaction has phased out.  Having your soils tested at the local extension offices will confirm that your efforts have been rewarded.  May of these agencies, or even 4-H clubs will offer this service to you for free.

Once you have realized your choice to garden more naturally you will need to start with organic seeds.  Many seed companies offer an organically grown product.  I like to reseed my own crops year after year.  It's a simple thing to do so be sure to read How Do You Seed?  It's the only way I'm completely sure I know what I'm getting.  Even if you are still in the process of conditioning the soil begin using organic seeds as soon as you decide on organically grown vegetables.

Be sure to observe the environment around you.  Unless you are fairly secluded you may find yourself with unwanted interference. Are your neighbors busy spraying there grounds and tossing heavy loads of fertilizer to get that "perfect" lawn?  These practices can hinder your efforts.  Chances are you can't convince them to stop using fertilizer, so be sure to place your garden in an area far enough away from the neighbor to avoid the run off.  On the other hand maybe you can sell them on the healthy benefits, and cost saving remedies toward a more organic environment.

It will take effort and time to create a truly Organic Garden.  It's a smart choice worth the achievement.  Keep the garden maintained with the proper products and you won't be disappointed.  Visit your garden every day.  Be attentive to it's needs and don't hesitate to take action if something doesn't appear to be working.


Saturday, May 18, 2013

Ready for the Root Vegi's


My potato plant before the blooms
 I have always wondered if it is just Mother Natures way of being funny, or making sure we really pay attention.  I can walk out to my garden any day of the week and instantly know when most of my crops are ready to harvest.  I know when my tomatoes, green beans and peas need picking. So what's up with those darn root vegetables?  They are some of my favorites.  No garden would be truly complete without a few of these common staples.  Potatoes, Onions, Carrots, Beets, Turnips, Radishes and the list does go on.  Well, maybe mother nature wasn't so sneaky after all.

My potato plant with blooms


Root vegetables are commonly called because it is the root of the plant that is harvested.  The edible goods grow beneath the surface of the ground making it difficult to  know when to harvest crops. Another common tribute is there ability to grow and produce very well in sandy soil.

Freshly harvested White Potatoes
Take the most popular root vegetable, the potato for example.  A potato plant will take approximately 75 days to harvest.  Some shorter, some longer depending on the variety.  It will also depend on the size of potato you prefer. White Potatoes are the most common, one of the quickest to harvest and in my opinion the most flavorful.  Once the blossoms of the potato plant begin to dry out and drop off you will want to check the roots to see how big the potato is.  If the growth is not exactly what you prefer gently return the plant to the ground and cover with dirt.  Try again in about 7 to 10 days and your crop should be ready to harvest.  Potato crops are typically harvested in Spring and than again in Fall

Beets

Beets are not quite as predictable.  However beets are quite edible in any stage of growth.  The younger the beet the sweeter they are. Typically harvested in the fall months Beets will take 45 to 70 days to mature.  Once the stem (or upper leaf) of the plant begin to spread outward and turn the purplish color of the vegetable than you'll want to check on the beets progress. You will also notice the top of the beet nudging above ground. If they are a size you prefer, than enjoy.  If not than cover the plant with soil and let rest another week or so.  Turnips fall close within the same family and harvest in the same procedure.  Don't forget to take advantage of the tasty green leaves of both vegetables for salads and soups.


Carrots and Radishes share a common harvest. They will take approximately 45 to 60 days to harvest depending on the size you prefer.  The vegetable will begin to peek above the ground and you can see the top forming.  Even though the head of the crop may seem mature the body may not be as fully developed.  Gently remove one stem from the ground to determine it's readiness.  If it is not mature enough for you preference return to the soil and cover loosely with soil.  Check the same plant again in a week.   Most importantly you must immediately remove the stalk from the vegetation immediately.  The stalk will continue to draw moisture from your crop leaving it drained.


Another common root vegetable is the Onion.  Onions come in many varieties and sizes.  Whatever you prefer they can and should be harvested as soon as they are big enough.  Once the stalk grows tall, sturdy and a deep green the crop is ready.  It's best to allow the onion to grow into various stages and sizes.  That way you can keep the harvest going as long as possible.  Begin digging a few of the onions from the soil when it is still possible to cook with the green stalk.  Eventually the remaining onions will grow larger and the stalk tougher leaving it unusable.  Your onion harvest is complete once the green stalk appears to be dying.  This is the final sign from Mother Nature that the remaining onions must be removed from the ground.
 
Everyone has at least one root vegetable they enjoy eating.  Most gardener's will tell you they are the most challenging crops, but worth every bit of effort.  They are some of the most vitamin filled vegetables, stay fresh longer and are more versatile than say a tomato.  You get a good harvest and you simply can't go wrong.

Saturday, April 20, 2013

Success With The Inverted Container


Do you think it might be a serious addiction if I can't seem to give up the gardening, now matter what the season is?  Nah!  I just call it sensible, and so much fun.  The inverted container is a great option for carrying on the harvest.  It works in any season and can be utilized indoors or outdoors.

The biggest trick to a container garden is knowing where to place it.  The planters on the right WILL NOT be suitable for indoor use.  They are way too heavy and need a lot of light.  That is why mine are hanging outside on a tree.  Normally I would not be tempted to make a purchase like this, but I found them on clearance.  The design makes them suitable for larger tomatoe breeds, or peppers.  There are much better designs that are easier to use.  Many you can find right in your own kitchen, or garage.


This simple planter is perfect indoor or outdoor.  It is good for lighter plants, such as peppers or herbs.  Tomatoes work very nicely in this planter also.  I recommend sticking to the smaller varieties though such as cherrie or grape.  Use a simple green planter that is just lying around, like the kind store bought plants come in. Cut a hole about 2" round in the bottom center of the pot and add about 2 inches of soil.  Place your favorite seeds in the soil and fill the container with dirt.  Be sure to add fetilizer, or mix some nice coffee grounds in with the soil. Hang the planter where it will get sufficient morning sun and watch the tomatoes grow.

This is my latest project.  I simply cut the top off an empty 2 gallon soda jug.  A 3 gallon jug would work much better, but his little guy won't be too heavy to hang.  A 2 gallon milk will work very well also.  Once the top was removed I softened the plastic in boiling water so I could cut a 2" hold in the very bottom center. I went straight to my compost for the soil and you can see how dark and rich it is.  I literally had to return the worms back to the compost. I placed a few Hatch Pepper seeds on top of 2" of soil and filled the remaining about 2 1/2 inches from the top of the container.  Using a hole punch three holes were placed 1 1/2 inches down from the top to hold the wires.  This will prevent the wire tearing through the plastic.  I would have preferred a nice strong twine but wire worked well.  I twisted the wire around a key ring to attach the planter to the ceiling hook.  Finally I place the container in a window that gets a lot of sun and gave it a drink of water.  When watering an inverted container you have to avoid over watering.  Hopefully in a week or so I will begin to see tiny sprouts of peppers peeking through.

Sunday, March 24, 2013

Caring For The Easter Lily


 It's not only one of the most beautiful, inspirational flowers there is,  it also represents the traditional passage into spring.  When these classy flowers start popping up on supermarket shelves you know warmer weather is near. Although it's origins can be traced to Japan today the largest portion of Easter Lilie's on the market are grown on the eastern coast of the US.  It is said that the hybrid bulbs of the Lily were brought to the US by American Soldiers station in Japan in the early 1900's.  They quickly became a popular household item.   Lilies can be found in many hybrids and colors.  The most popular is of course the white Easter Lily.


Our first year in our new home my husband bought me a Lily that was tall, beautiful and strong.  I still have that Lily.  Now it glorifies my flower garden and has multiplied to a total of six bulbs.  Each year it produces even more Lilies and continues to shows off it's beautiful blooms.  Transplanting a Easter Lily is easy to do and should provide many spans of eye pleasing endurance.  It's also acceptable to keep your Lily indoors as a house plant.  Either way you'll want to make sure you get the most enjoyment and pleasure out of your dazzling plant year after year.  Pick the right place and provide the proper nutrition and you won't go wrong.
You have two choices, either purchase a full grown plant or a bag of Lily bulbs from you local nursery.  If you purchase a full grown plant select one in various stages of bloom.  Lilies will grow up to three feet tall, some even taller.  It's important to make sure the flower you bring home hasn't already outgrown it's pot.  Keep the plant indoors in a room that has plenty of morning sun.  Water only when the top soil is dry.  Over watering a Lily is the number one reason they will not survive.  Easter Lilies will not handle extremely hot temperatures either.  Once your Lily begins to show signs of wearing down trim back the wilted blossoms.  Take good care of the plant throughout  the year and each season your Lily will bloom elegant new foliage.
 
If you purchase bulbs simply place them in the ground at least six inches deep and 6 to 8 inches apart.  Plant in a well drained area with plenty of morning sun and afternoon shade.  You'll want to make sure you plant in early spring for the best blooms.  Feed and water as needed.  Be sure to read and follow your package directions.
 
If you prefer to move you plant outside it's a good choice.  The bulbs will reproduce and  provide new perennials every year.  Plan on transplanting the Lily after the last bud has expired and been clipped away. Find a spot outdoors with plenty of morning sun and afternoon shade.  Be sure to find a well drained garden for transplanting.  It's important to dig a hole with plenty of space for the plant to evolve.  Adding a good time released fertilizer is recommended.  I prefer to feed with plenty of coffee grounds on a regular basis. Once the temperatures are warmer than the Lily can tolerate it will wither.  But like any good perennial the Lily will hibernate beneath the ground during the winter months.  Once the grounds thaw and the sun is warmer your Lily will be one of the first to peak from beneath it's hiding place and bid you a Glorious Spring!


Saturday, March 23, 2013

When To Compost


The composter my husband rescued
from the trash for me


It's no secret that I am a big fan of compost.  Any dedicated gardener will tell you it's the best thing you can do for your garden.  I've written about it many times before.  The Benefits of Compost, 10 Dos and Donts for Compost and Keep The Compost Going are all full of  good tips for any composting beginner.

Think of a compost as the means of returning to the earth those nutrients we deplete when we  garden.  It is a cycle of give and take that anyone can benefit from.  We enjoy the nutritious crops we harvest from our garden, than we return the nourishment back to the soil with scraps and discarded yard clippings.  Now our yield of produce will be as beneficial as it is every year.  The earth is supplying our foliage what it needs to provide tasty vegetables.  We are supplying our earth with the supplements necessary to give our vegetables a generous output.
The beginning of a good compost
with yard clippings

If you've read my prior posts on compost I've touched on the benefits of adding compost to your vegetation, as well as the benefits on the environment.  I've touched on how to begin and what is acceptable to add to a compost.  I've also discussed how best to take care of the compost so it will transform from scraps to a decomposed wonder.   But how do you know when it's best to compost?  Is it possible to add too compost to a garden?  How do you know when you've added enough compost?


When you take care of the compost you develop a rich dark soil that is full of  beneficial chemical elements.  The result becomes the most abundant soil conditioner your plot will thrive with.  The earthy aroma of your compost is a very good sign that it is ready to blend with your garden.  It's a fragrance you simply can't miss! Be sure to use only the dark rich soil by turning the compost and using what is on the bottom.  The picture on the right shows what is beneath the fresh leaves at the top of my compost.   A compound that is almost black in color and ready to go to work for me.  Another option is to simply stop adding to the debris so it dissolves completely.


When mature compost will be dark
 and smell rich
I would say the number one rule of gardening is pay attention and listen to you plants.  Before setting out seeds I like to mix in a heap of compost, at least 3 inches deep, with the ground.  Stir it in well and allow it to set for a few day and you've got a good start to a bountiful yield of fresh produce.  Adding water to the mixture is a good way to help distribute the compounds evenly. Many people recommend just layering the top of your ground with compost.  I find that blending increases the available advantages. Once your seedlings begin to sprout your will notice a very healthy appearance.  As they mature you want to continue profiting from healthy plants.  Chances are you may not need to recondition your soil.  If your plants begin to look like they are suffering from more than heat additional compost won't harm them.  This is when it is more beneficial to add a layer about an inch think around the base of your plant and add water to help penetrate the plant.

The more you compost the healthier your soil is.  If you have already been distributing compost for several years your soil is fairly healthy.  Once conditioned it is only necessary to freshen the land in early Spring, or just before planting.  For me it's preferable to compost in late Fall and again just before growing season.  If you have started a new process of composting it won't harm your plants to circulate another layer of compost in late spring or early summer.  It's difficult to "over" compost the plot, but you always want to make sure you've conditioned enough.


Sunday, March 10, 2013

The Plant I Never Grew


I guess just about every gardener has their own little "nemesis".  Let's just say I hope I'm not the only one.  I'll grow pretty much anything I can get in the ground or in a pot..  I dig up the Crepe seedlings from my neighbors tree.  I place them in a container and nurture them until they are ready to transplant to the ground.  No problem, piece of cake. I plant my garden and relish in the rewards of my efforts.  But I got this one little thorn in my side that always throws me for a loop.
I love the Aloe Vera not just for it's nurturing advantages.  I've long known the benefits of the plants juices and inner gel.  It's a prominent remedy for burns and a very natural form of relief from Eczema.  Aloe Vera Juice is more common on market shelves.  Studies show the juices have even been found to ease peptic ulcers.  Research also shows that it could be beneficial in immune support and digestive disorders. The fact-finding continues as new benefits are explored.  My mom has used this stuff  for as long as I can remember.  Me, well I'm a bigger fan of the plant itself,  but do admit I've torn open a stem or two to rub some jell on a rash or burn.

 I tried over and over again to figure out how to get one of these gorgeous plants to grow.  Some would even last a few years than fizzle quickly.  I'm husband would just shake his head at me knowing I'd rush off to get a new one.  I know I'm being stubborn.  My mother calls it determined, but than she's mom.  I'm no novice when it comes to nurturing plants.  I know Aloe Vera is a cactus.  It requires plenty of direct sun light, warmer temperatures and very little watering.  So what was I doing wrong?

 Was I giving it too much water?  Did it not get enough light?  The stems of the plant turned mushy at the bottom and fell off.  This is a sign that the plant is getting too much water.  My husband and I did not communicate well on our watering routine.  Aloe Vera hold natural moisture and do not need water often.  Sometimes the stems would turn yellow.  Turns out I didn't not condition the plant properly between indoors and outdoors and it suffered shock. Aloe Vera should be filtered slowing into direct sunlight if transferring from shade.

Now that I now the cause I can hopefully proceed with the cure this time.  I will remove the plant from it's current pot and make sure it has more than enough light.  I will also let my husband know when I have watered the plant.  I will feed it a small shot of coffee grounds blended into the soil to add a little fertilizer.  If my efforts don't pan out I know my husband will shake his head and I will be off to the nearest nursery.

Saturday, March 9, 2013

MOTHER NATURE IS CALLING


Most gardeners will tell you that there are many tools of gardening to guide you along the way.  I've even written about a few I've used (see Know Your Zone).  Most of us who garden will have our own view on the prime efforts to achieve gracious results.  At Home Depot the other day my husband ask the Home and Garden employee if it was too early to plant potatoes.  She replied no.  I strongly disagreed.

I've consulted many websites along the way.  I've partnered with The Farmers Almanac and Southern Living magazine all in an effort to get the best results from my crops.  Truth is, as the old saying goes, experience is the best teacher.  When you think about it every ambition in life is a result of someones experience.  Someone who took the time to pass the experience along hoping that traditions and dreams survive.  That we continue to grow and achieve by taking advantage of others observations. Do you have a favorite guide to consider before planting?

While many are still experiencing the dreads of colder climates the area I live in is much milder.  The days are pleasant, the evenings not too chilly.  Mother Nature has taken her wand and spread a hue of green around.  The ground is full of brilliant green above the stagnant brown.  The trees have come alive again with leaves lightly blowing in the wind.  Although Spring has not officially arrived Mother Nature has offered up her opinion of the turning weather, and it looks promising.

Now that I have praised mother nature let me get back to my garden, and the reason I strongly disagree it isn't too early to plant potatoes.  This picture is from my garden just this morning (2/9/13).  Yes, it's a potato.  Funny thing is I hadn't planted potatoes when this little cutie peeped up out of the ground.  Looks like I missed one from my fall crop and it stayed dormant throughout the colder months.  Now Mother Nature has cast her wand and without hesitation my forgotten potato has arrived with big surprise.  The above picture is a pea from my garden.  A Snap Pea that was planted in late November (they prefer cold temperatures).  Of the seeds that did sow and prosper the one above decided to be a late bloomer.  Another nice gift from Mother Nature.  Mother Nature is always a full of surprises.  Finding my spring garden taking off on it's own is one I welcome with a big grin.


So, for my point.  Years of scientific efforts and documented research can't beat the one tried and true sign that you got a go ahead to plant.  When Mother Nature Calls I do hope you will listen.  And by the way I did plant my spring potato crop despite what I was advised.

Saturday, February 16, 2013

How Do You Seed


 Every year it comes around like an anticipated gift.  The weather gets warmer and you know Spring Gardening is only weeks away.  For most the gardening never ends just because the weather changes.  It only shifts focus.  Indoor, Outdoor, In Ground or Container it all has the same desired result.  I always start my gardening the same way (see Starting a Spring Garden Indoors).  I pull out the seeds weeks before planting time and prepare my starts for planting outdoors.  I always want to make sure I am ready when the weather speaks to me.  Not every plant needs a "start" indoors.  Most are quite productive simply planting in the ground.


But how do you find the seeds you need?  There are many markets available for selling just what you need.  On the other hand why not just save part of one years crops for the next years garden?  I can't think of a single crop that doesn't have it's own built in seeds.  Some we eat (ie Green Beans and Tomatoes), most we clean away and discard (ie: Peppers and Cantaloupe) which is a shame.  Some even grow on the vine (ie: Spinach) I leave a portion of everything from my garden for a new years worth of growth.    It's simple to do and is a sustainable way to keep the crops growing.


Removing seeds for preservation works in several ways depending on the produce.  For those crops with edible seeds, for example okra and green beans,  I usually leave one or two set aside and let them dry out.  Once they are dried I open them down the middle and remove the seeds.  For those plants where the seeds are removed before eating, like peppers and cantaloupe save some seeds and set them aside to dry out.  For root plants just let the roots grow (see Plants That Reproduce With Little Or No Cost) and plant them in the ground.

Maybe this year you want to try growing something new, like a cucumber for example.  You have two options for getting seeds.  Buy a package of seeds from a lawn and garden store.  This can be somewhat of a gamble.  You'll never know what chemicals these seeds have been treated with.  On the other hand you probably wanted to buy a cucumber anyway so why not buy an ORGANIC one and spoon some of the seeds out of the inside.  You won't need many.  Maybe five or six.  Set them aside and let them dry out before planting.

Gardening has been the most sustainable human resource from the beginning.  Once you get started like most you'll probably get hooked.  The easiest and most inexpensive way to keep the planting going is to save your own seeds for planting.  I gaurantee you won't be sorry you did.

10 Do's and Dont's for Compost


I am a very big fan of compost, there is no doubt.  I've written about it previously in The Benefits of Compost  and Keep The Compost Going.  Not only is it the ultimate gift to your gardening, it's also giving back.  Returning to the earth what nutrients have been depleted. It's also an effort to help reduce the overwhelming landfill waste. So, whats the best and worst things you can do for a compost?

My composting started out in our back yard with a chicken wire fence.  It started with basic lawn debris.   Grass clippings, raked leaves, etc.  Than we began reading up on what else could be added to my compost (thanks @compostjunkie.com).  I was pretty surprised at the number of items I could keep out of the trash and use to boost my compost.  Every time I would turn the ingredients I could smell how rich the soil was getting.  Than my husband found me a full fledged composter on the side of the road.  It's not important how you compost, only that you do.

Monday, February 11, 2013

Container Pepper

New Peppers growing on my Container Pepper
I love to container garden. Every year when it's time to start clearing out the spring garden for fall planting it's hard to see a seasons worth of crops end.  Container gardening is my way of keeping the planting  going.  My husband decided to carry the craft a little farther by combining our spring crop with the container garden.  If anyone had ever hinted that pepper plants can be kept alive for almost a year, and still produce crops I'd probably have laughed.

My peppers did very well last year.  There became a time when the plant was still healthy.  The blossoms were not appearing any longer.   The crops were not getting any larger.  I figured they had probably ran there course for the year.  I came home from work one day in early fall and my husband had rescued the two remaining spring plants in the garden.  One red pepper, and one jalapeno pepper.

He carefully dug a hole around each plant deep enough to be sure he did not miss any roots.  He used two 10 gallon icing buckets he retrieved from work (for free).  Five drain holes are drilled into the bottom of each bucket.  The lid works perfectly to catch any run off .  The bucket was filled with a 50/50 mixture of potting soil and fresh compost.  The bottom of the bucket was filled abut 12 inches full of soil and the plant set inside.  The bucket was than filled to the top and the soil packet tightly.

I immediately gave both peppers a nice drink of cold, leftover coffee (plants love this).  I was still doubtful that any good would come of this.  I set the plant in a dining room bay window because it has the best direct sun.  I continued to feed the plant and kept a close eye on it hoping for the best.

Before long the remaining peppers began to grow again, and finally ripen.  I'd walk from my kitchen counter to my bay window and pick a pepper directly from the plant for dinner.  That's my kinda shopping!  Now, almost a year after I first planted these peppers in the garden they are still sitting in the bay window and producing new peppers.  My only question now is should I leave it growing where it is, or put it back in the garden when the weather is ready?  Oh well, I'll decide that later.

Sunday, January 20, 2013

Keep The Compost Going

It's pretty darn cold outside right now.  No matter what the temperature, it is mandatory to keep the most important thing you can do for your garden going!  If you keep up with my Facebook page at  Home Life Ideas you'll recognize my new composter.  I didn't go out and spend a bundle on this toy.  My husband, the ever thrifty picker, found it on the side of the road for me.  When he found it he knew I'd get a big kick out of it.  I'd never go out and buy something like this for myself.  We previously had a compost cooking up in some chicken wire fencing.  This thing even has appropriate ventilation.  Composting needs good airflow to help with the deterioration and transformation to an appropriate gardening tool.

It didn't take long before I began to find things all over to fill it with.  Clippings from the yard, coffee grounds, food scraps.  If you are looking for a detailed list of what is or is not appropriate for a compost check Compost Junkie.  He'll have the answer to just about any question you have when it comes to creating a nutritious boost for you garden.

 One of the biggest set backs of composting is avoiding the insects.    During the hotter summer months flies, ants and several ground critters will try to invade your work.  Rule #1-NEVER EVER pour insecticide inside your composter.  This would be a major draw back to your accomplishment. Those insecticides will transfer where ever the soil is placed. A good line of defense is to be sure you keep a balance between green and brown.  Maintain an equal portion of food scraps:plant trimmings.  This will also help avoid an over pungent compost. It's also a very good ideas to add moisture to the compost.  Ants are not fond of anything wet.  Be careful though.  You've got to hold on to those earth worms.  They help break down the compost and keep it fit.

Anther good defense against insects is to pay attention.  Do not simply leave the compost unattended hoping it will do the work on it's own.  One of the most important things to do for you compost, no matter where you do it, is keep it rotated.  When I peal back the top layer of my compost I can see (and smell) the rich, dark soil my garden craves developing beneath. When this packed mixture is added to my plants they grown healthy, and ready to produce.  To help keep the process going, and keep the insects in check, I like to stir the contents no less than once a week, more if the temperature is hotter.  Keeping the process going can actually speed up the transformation, cutting down the time it takes to produce a soil ready product.  A  development that can typically take anywhere from two to six months to complete.

It is undoubtedly one of the best things you can do to maintain a healthy garden.  That's just the greatest benefit.  If you are conscious about what goes into the compost you will find up to 30% of your household trash stays out of the landfill.  You could actually purchase compost from a supplier, but don't you think you deserve all of the benefits without paying for them?  Don't think of composting as a chore, think of it as a fun and beneficial way to feed your garden, and promote the environment.

Monday, January 7, 2013

A Very Special Plant

 We spent a lot of time with my grandmother growing up.  She loved to go fishing with grandpa and could fry up a catfish that is unbelievable.  I can still smell that wonderful aroma filling the house on a Sunday evening.  She enjoyed quilting.  Even won several ribbons for her beautiful designs.  I'm fortunate enough to be in possession of one of those special treasures.  She loved the garden too.  She composed some great dishes with those home grown crops.

She enjoyed having birds around too.  She loved to hear them singing in the mornings. She raised a family and remained strong even when things seemed to be hopeless.  I like to think I've got a little something of her in me.  I know my mom does.  Mom's a remarkable cook and still loves to garden.  I think they are inherent qualities.

The Chlorophytum Comosum, more typically referred to as a spider plant, is the first plant I ever received. I must have been in my early twenties when I received what would be the beginning of many generations and start overs for this common beauty.

When I set up house on my own I had no plants.  Grandma figured that wasn't proper so she donated a handful of transplants so I could start my own home grown house plants.  The spider plant is an excellent choice for a new beginner.  Not only is this plant a gorgeous color, but it is about the easiest plant I know to get started.
Every one of those little sprouts flying out of the middle of the plant actually develops it's own strong healthy roots.  Simply clip a the sprout slightly above the wing   All you need is a good pot, potting soil and some healthy fertilizer.  I have to caution though.  This plant will grow fast, and the bigger they get the more pleasant they are to have around.  Be prepared to get a much larger pot and transplant it soon. (see Transplanting Plants for more information).   These are a tropical plant and do not tolerate hot temperatures very well.  They do, however enjoy lots of indirect sunlight.


On a couple of  occasions I have opted to to give my spider plant a fresh start.  I clipped a handful of starts and produced a  new plant. I personally have three full grown plants growing in my living room right now.  My daughters have received there own share of starts from this plant.  It will always be grandma's plant and it's like I'm passing on a part of her to them.  I still see her when I look at my plant.  When I know my plant is reaching signs of distress I react quickly.  It wouldn't do me any good to let grandmas plant phase away to nothing.  It's one small way I can keep her close to me.